![[08] TDA4VM EdgeAI Example](https://img1.daumcdn.net/thumb/R750x0/?scode=mtistory2&fname=https%3A%2F%2Fblog.kakaocdn.net%2Fdna%2FbOZDmW%2FbtsEtsiYZwh%2FAAAAAAAAAAAAAAAAAAAAAP6y4hGq8A6QDP9ImvkFnzyCpRO_7RKoj9s1IjT8_tIf%2Fimg.jpg%3Fcredential%3DyqXZFxpELC7KVnFOS48ylbz2pIh7yKj8%26expires%3D1753973999%26allow_ip%3D%26allow_referer%3D%26signature%3DYvuxMkDEqoz2vQWM5RUFudyT45E%253D)
테스트 환경
- TDA4VM Edge AI Starter Kit
- TDA4VM-SK Processor SDK Version 08_06_01_03
- IMX219 Camera (Rpi)
본 글은 카메라 스트리밍을 사용하여 TI(TDA4VM)에서 딥 러닝 모델을 실행하는 글 입니다.
TI의 TDA4VM SoC에는 듀얼 코어 A72, 고성능 비전 및 비디오 코덱 가속기뿐만 아니라 캡처 및 디스플레이를 위한 고대역폭 실시간 IP도 포함되어 있습니다.
먼저 아래 이미지와 같이 보드에 연결한다.

minicom을 사용하여 TI 보드를 연결하려면 UART 케이블을 연결해야한다. 그런 다음 Linux 시스템에서 터미널을 연다.
minicom을 사용하여 TI 키트에 연결하려면 아래 명령을 실행
$sudo minicom -D /dev/ttyUSB2 -c on
minicom이 설치되지 않은 경우 minicom 설치
$sudo apt-get install minicom
Linux가 부팅되면 비밀번호 없이 루트 사용자로 로그인합니다.
TI 개발 보드에서 샘플 데모 프로그램을 실행하려면 python_app 폴더로 이동하고 다음 명령을 실행합니다.
root@tda4vm-sk:/opt/edgeai-gst-apps/apps_python# ./app_edgeai.py ../configs/image_classification.yaml
카메라 스트리밍을 이용한 예제 실행 방법
다음 명령을 사용하여 imx219 카메라가 감지되었는지 확인한 후 비디오 노드를 기록해 둡니다.
root@tda4vm-sk:/opt/edgeai-gst-apps# ./init_script.sh
CSI Camera 0 detected
device = /dev/video2
name = imx219
format = [fmt:SRGGB8_1X8/1920x1080]
subdev_id = /dev/v4l-subdev2
isp_required = yes
다음 gstreamer 명령을 사용하여 카메라가 작동하는지 확인한다.
gst-launch-1.0 v4l2src device=/dev/video2 io-mode=5 ! queue leaky=2 ! video/x-bayer, width=1920, height=1080, format=rggb ! tiovxisp sensor-name=SENSOR_SONY_IMX219_RPI dcc-isp-file=/opt/imaging/imx219/dcc_viss.bin format-msb=7 sink_0::dcc-2a-file=/opt/imaging/imx219/dcc_2a.bin sink_0::device=/dev/v4l-subdev2 ! video/x-raw,format=NV12, width=1920, height=1080 ! queue ! kmssink driver-name=tidss sync=false force-modesetting=true
카메라를 사용하여 데모 모델을 실행하려면 구성 파일에서 변경 사항을 수행해야 합니다.
데모 구성 파일은 YAML 형식을 사용하여 입력 소스, 모델, 출력 및 흐름을 정의합니다.
기본 데모용 구성 파일은 edgeai-gst-apps/configs 폴더에 보관됩니다. 폴더에는 모든 사용 사례와 다중 입력 및 다중 추론 사례에 대한 구성 파일이 포함되어 있습니다. 폴더에는 템플릿 YAML 파일 app_config_template.yaml도 있습니다.
구성 파일은 4개의 섹션으로 나뉩니다.
- Inputs
- Models
- Outputs
- Flows
예를 들어 얼굴 감지 모델을 살펴보면
먼저 configs 폴더로 이동하고 폴더 안에 face_detection.yaml을 확인한다.
root@tda4vm-sk:/opt/edgeai-gst-apps/configs# vi face_detection.yaml
title: "Face Detection"
log_level: 2
inputs:
    input0:
        source: /dev/video2
        format: rggb
        width: 1920
        height: 1080
        framerate: 30
    input1:
        source: /opt/edgeai-test-data/videos/video_0001_h264.h264
        format: h264
        width: 1280
        height: 720
        framerate: 30
        loop: True
    input2:
        source: /opt/edgeai-test-data/images/%04d.jpg
        width: 1280
        height: 720
        index: 0
        framerate: 1
        loop: True
models:
    model0:
        model_path: /opt/model_zoo/ONR-OD-8420-yolox-s-lite-mmdet-widerface-640x
        topN: 5
outputs:
    output0:
        sink: kmssink
        width: 1920
        height: 1080
        overlay-performance: True
    output1:
        sink: /opt/edgeai-test-data/output/output_video.mkv
        width: 1920
        height: 1080
    output2:
        sink: /opt/edgeai-test-data/output/output_image_%04d.jpg
        width: 1920
        height: 1080

flows:
    flow0: [input0,model0,output0,[320,180,1280,720]]
얼굴 감지 모델을 실행하려면 Python 앱으로 이동하여 다음 명령을 실행
root@tda4vm-sk:/opt/edge_ai_apps/apps_python# ./app_edgeai.py ../configs/face_detection.yaml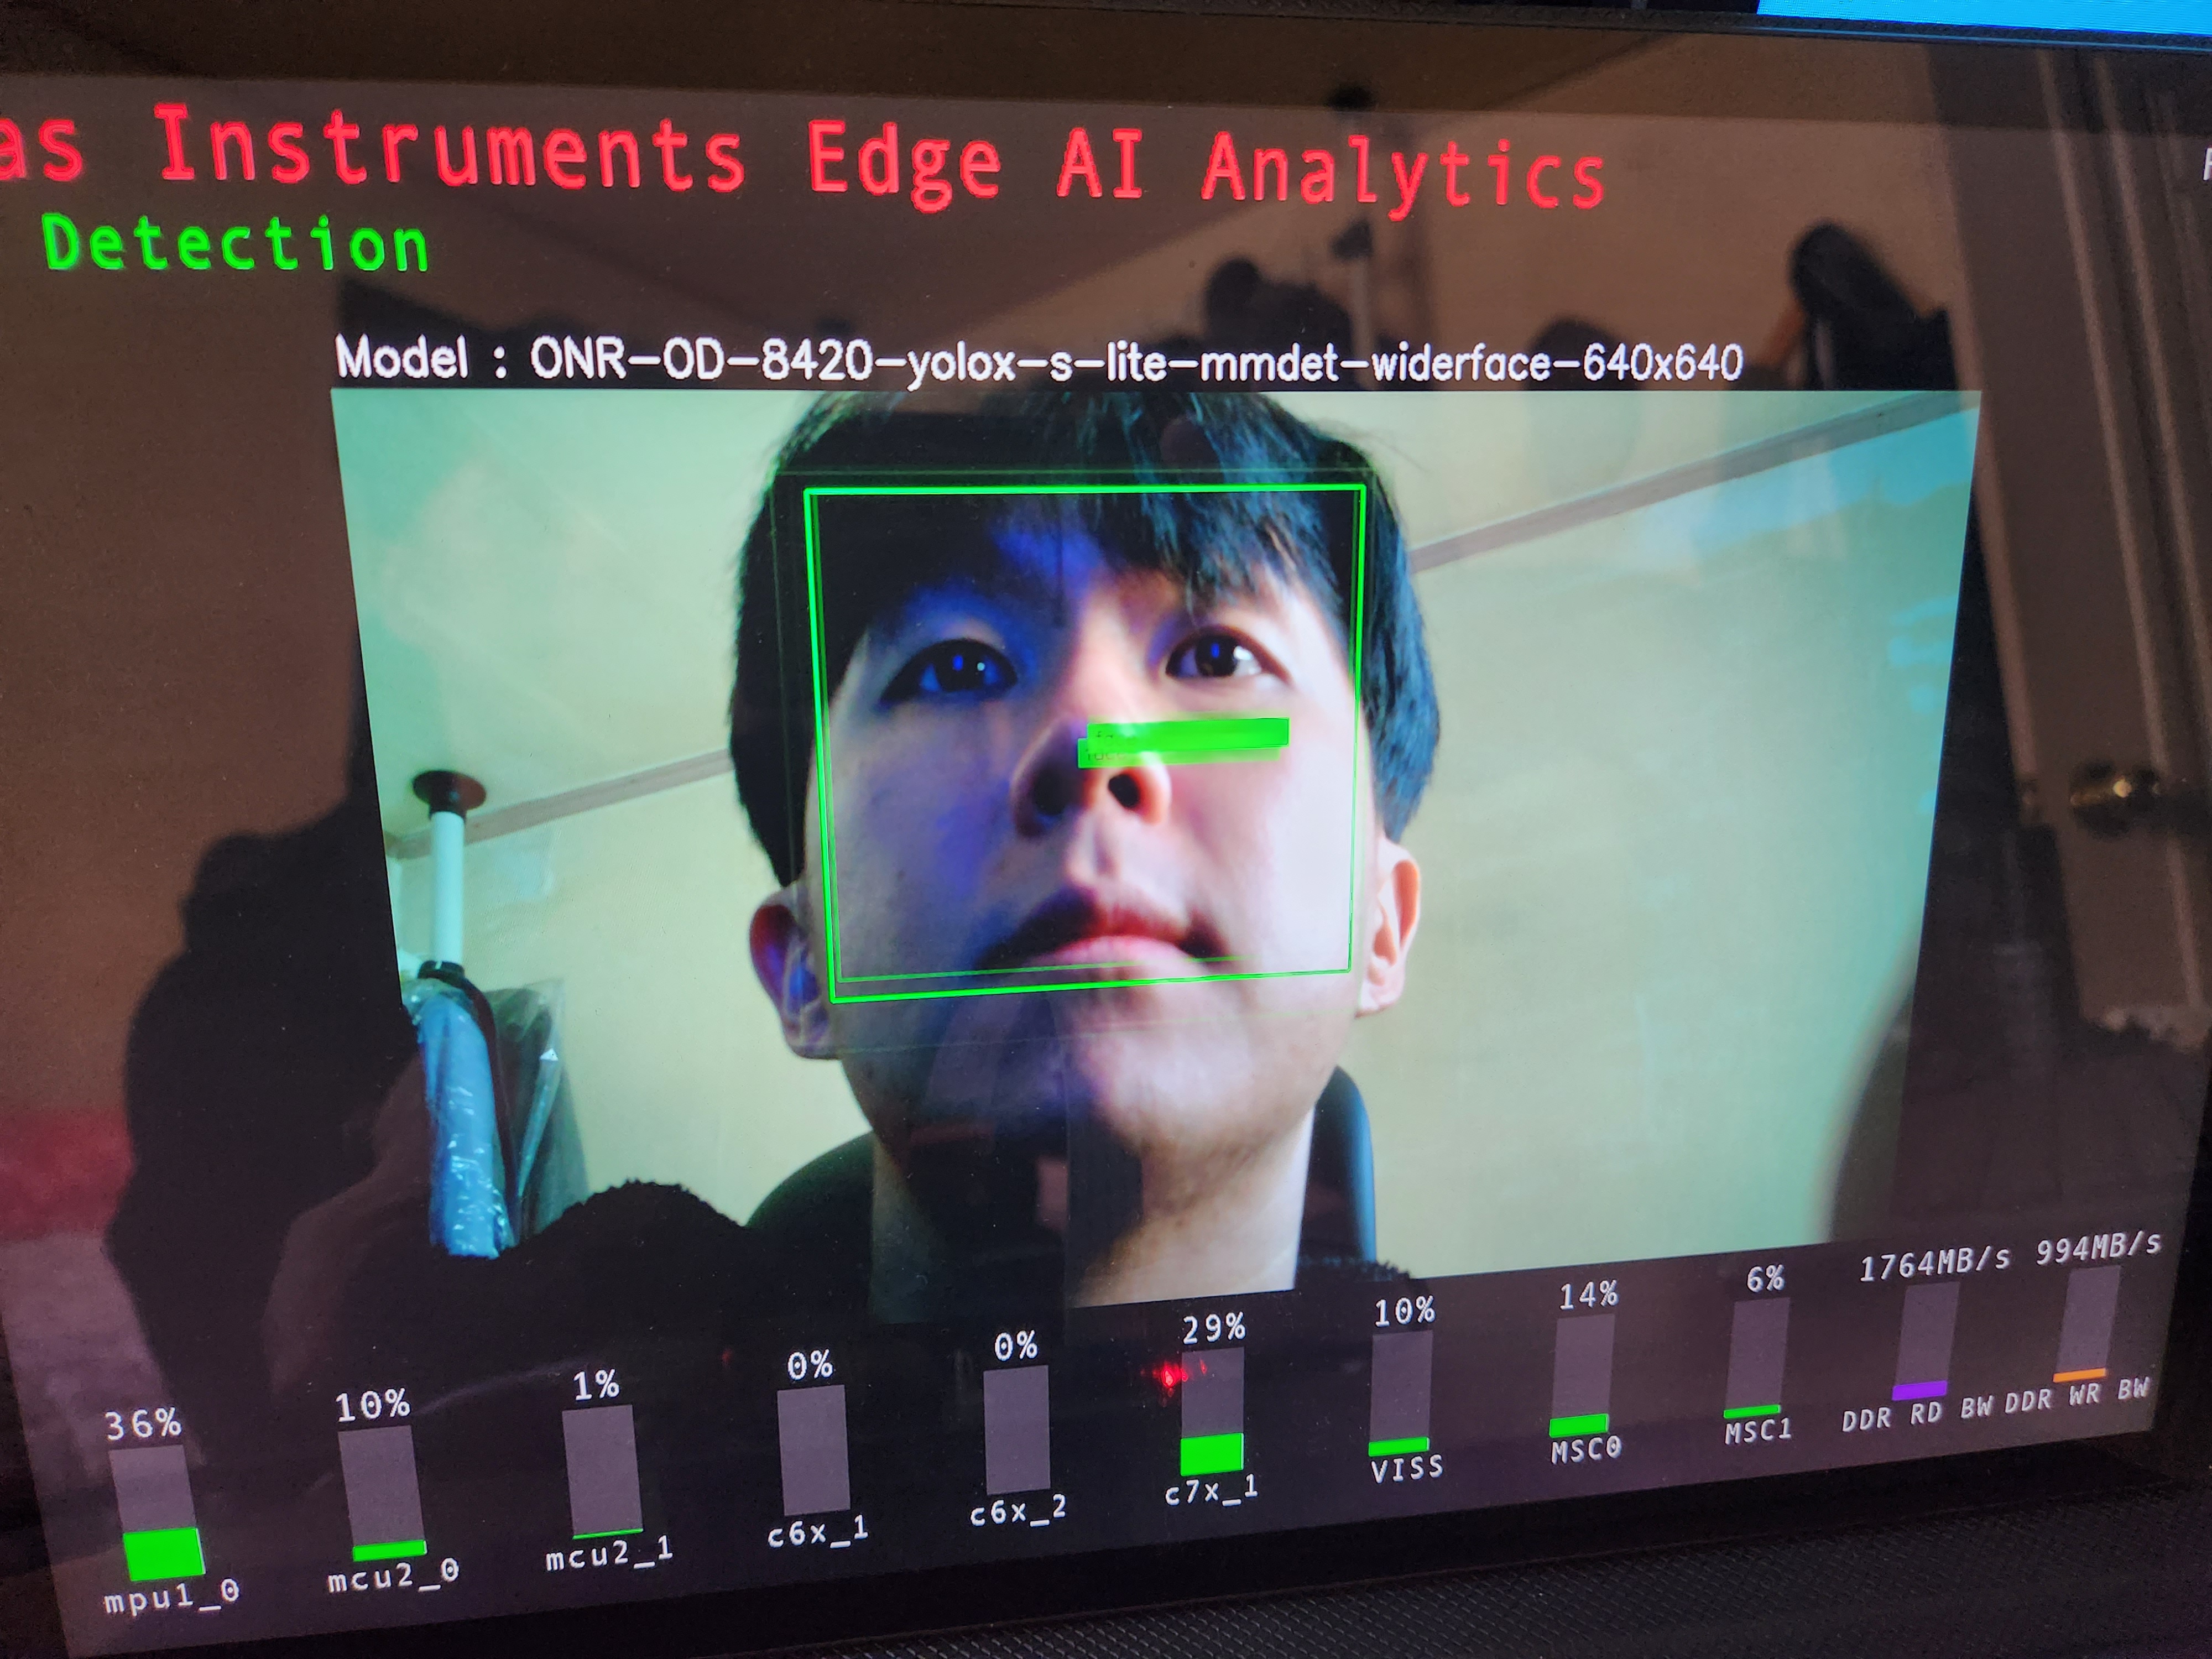
Single_input_multi_infer.yaml은 카메라 입력을 받아 각각에서 여러 모델을 실행합니다.
Single_input_multi_infer.yaml 파일의 구성 파일을 이전 face_detection.yaml 파일과동일하게 변경하고 다음 명령을 실행합니다
root@tda4vm-sk:/opt/edgeai-gst-apps/apps_python# ./app_edgeai.py ../configs/single_input_multi_infer.yaml

'TI > TDA4VM' 카테고리의 다른 글
| [08] TDA4VM - SDCard 이미지 만들기 (0) | 2024.02.03 |
|---|---|
| [08] TDA4VM-SK Processor SDK Build (0) | 2024.02.01 |